


Hey, crafters! Tmika here! Pastel colors have ARRIVED!!!! Here comes Peter Cottontail, hopping down the bunny trail... hippity, hoppity, Easter’s on its way!!! 🐇🐇 I HAD to. I just had to. 🙃 Now I bet you can guess what I have in store for this month’s project, right?? Yep, something to do with those cute, cuddly, furry little creatures... BUNNIES!! Plus, I have a free SVG file for you to enjoy! Yay! First, let’s go over the items you’ll need and a few extras.
- Cardstock Warehouse Cardstock Papers:
- Gesso Materica 92lb
- Sunflower Lessebo Colours 83lb
- Park Green Colorplan 100lb
- Lavender Colorplan 100lb
- Other Supplies:
- SVG File (click to download)
- Bearly Art® Glue
- Hot Glue
- Foam Squares
- Embossing Folder
- Mini Fuzzy Balls/Pom Poms
- Bone Folder
- Adhesive Vinyl
- Flat Back Pearls
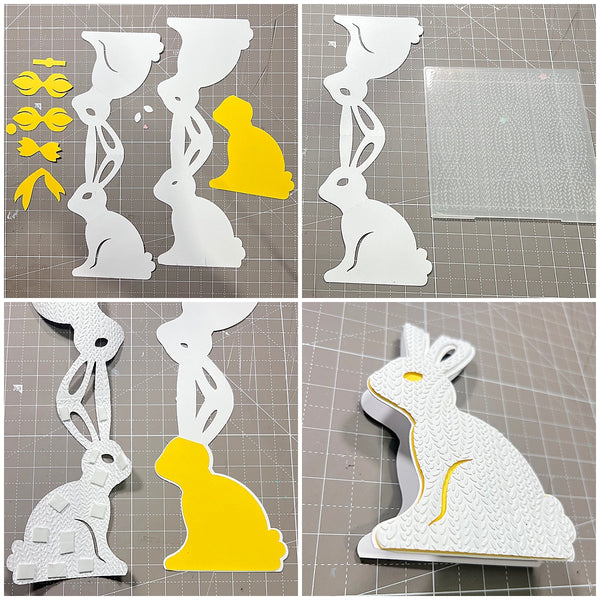
Ok, Let’s get started!! Start by cutting the SVG file (included above) in your desired colors. I cut my base and my top layer (1 & 3) in Gesso white. I used 3 different colors for layer 2; Sunflower Yellow, Park Green, and Lavender. Feel free to make whatever color you want. That’s the beauty of cardstock – so many choices!
I took my top layer and embossed both sides with a very textured embossing folder. This sweater one did the trick! Take layer 2 (solid colored piece) and glue it to the white base using wet glue. Going back to your embossed layer, add foam dots to the back to add dimension. Once complete, adhere that layer on top of the base. (This should already have the solid piece attached.) Your finished card/place card should look like this.
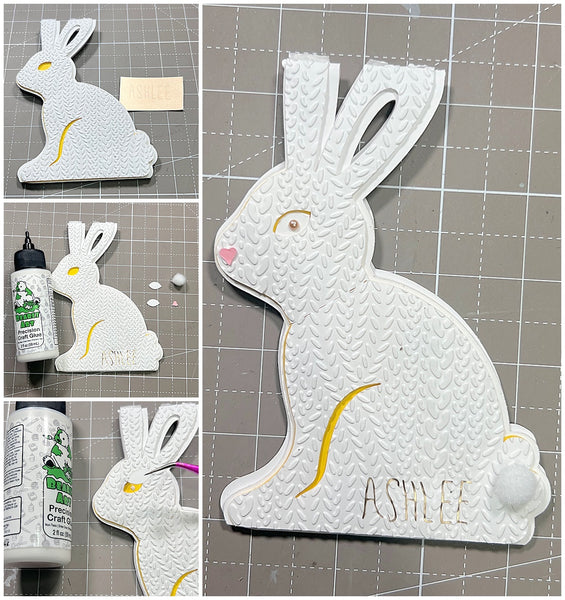
As an added option, add some personalization. I used some adhesive vinyl in a beautiful rose gold color to cut my names out.
Next, we can do one of two things. We can attach the eyes (cut in white and a black piece for the center) as normally. Or we can (what I did) just attach the whites of the eyes and add a cute little flat back pearl as the accent on the eye. I happened to have coordinating supplies for this – so I went with it. I cut the whites of the eye twice, just to add a little depth and applied my pearl with wet glue. I added the fuzzy tail to its rump with hot glue and the heart nose on the tip of the face. I think it turned out so cute!
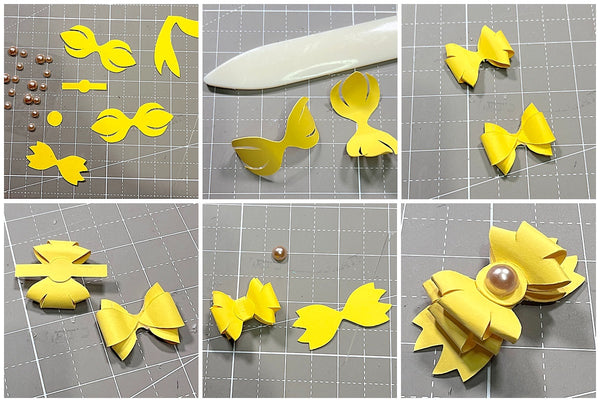
Now that our little friend is all put together, we can work on the bow embellishment. I cut my bow base layer twice – cause I’m extra and so is he! Curl your bow to help make the bow a little more flexible for gluing. I always use my bone folder for this. Fold over each of the pieces and secure them with hot glue. Fold the middle piece last – it should stick out a little more than the ends. If you are apprehensive about using hot glue on something so small, just use wet glue. It’ll take a little longer to dry, but it will work.
Add the connecting piece to the top and stack the two bows on top of each other. Fold over the flaps of the connecting piece to secure the two pieces together. Add the bow wings to the bottom, your circle center piece on top, and finish with your flat back pearl. Now we are finished with the bow. Keep this file handy. It’s so useful for so many projects!
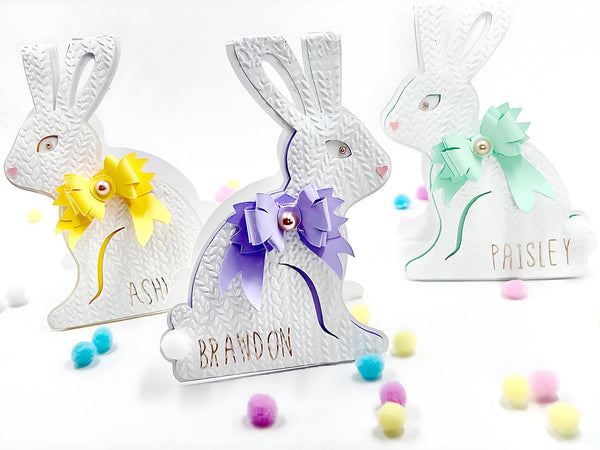
There is a bow banner (I don’t know what else to call it) to add to the bunny. Line it up with the perforated marks for added flair. Now lay that fabulous bow you made to the top of that and – VOILA!! We are done!!

We can use these to make cards, place card holders, or even stuff them inside an Easter Basket as a personalized tag! So many options!! As always, thanks for stopping by to visit the blog. Be sure to tag us if you decide to make our cute little furry friend!! I appreciate you!!
If you are super fancy - tag us in your creations on Facebook or Instagram. You can use the hashtag #cardstockwarehouse to be featured on our page!