


Over the past few years I’ve taken charge of hosting Mother’s Day here at my house. I try to have a fun theme and have some cute table decor. This year I thought it would be fun to do a tea party theme. I started searching for some teacups to add flowers to for some centerpieces and found that it would cost quite a bit. I thought about thrifting some, but then I would have to spend time searching thrift stores for tea cups and it would still be pretty pricey. Then I had the idea to make some! This adorable fun craft is the result of that spark of imagination.
To create this adorable 3D paper teacup, you will need:
- Cardstock Warehouse papers:
- Colorplan - White Frost 100 Lb.
- Colorplan - Royal Blue 65 Lb.
- Kromekote Glossy White
- Cricut Maker, or Explore
- Printer (optional)
- Scoring tool, or scoring wheel tool
- Bearly Art™ Glue
- Floral Wire
- Tape
- Plastic Wrap
- Flowers (I used plantable flowers from the garden center)
Now that you have everything you need, let’s get to work creating this fun 3D teacup!
To begin, cut all of your pieces on your cutting machine.
The cutting file for this project can be found by clicking this link to Cricut Design Space: Teacup Flower Centerpiece
After cutting out all of your paper pieces, you’ll start by folding along all of the score lines on the small teacup base.
Using glue, attach all of the tabs to the opposite side to create a 3D base for the teacup.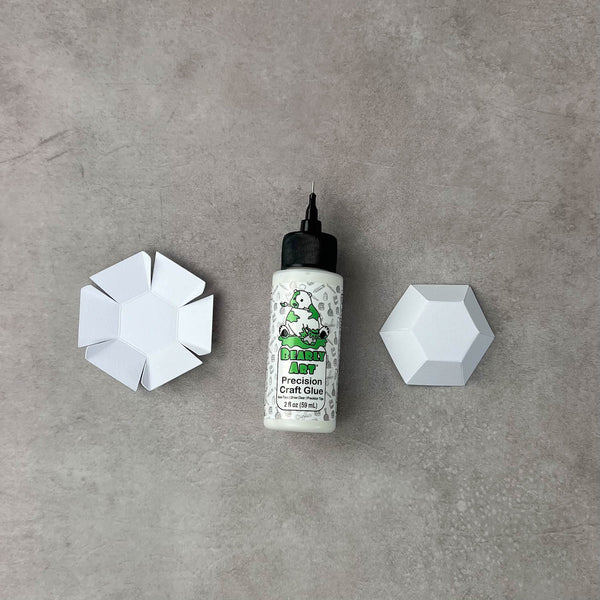
Fold along all of the score lines on the large cup portion of the teacup. 
Working around the bottom center of the cup cutout, attach the tabs to the opposite side of the teacup cutout. 
After all the bottom tabs have been glued, repeat the same steps for the next tabs on the upper part of the teacup.
Repeat this process for the interior blue piece of the teacup, starting at the bottom of the cup and working up, gluing all of the tabs.
At this point you will have a blue inner cup and a white outer cup assembled.
Place the blue inner cup piece into the white outer cup and glue together.
Next, you will fold and glue the teacup handle piece.
At this point you will have 3 pieces folded and glued. 
Glue the cup to the base, and the handle to the cup. This will complete your teacup.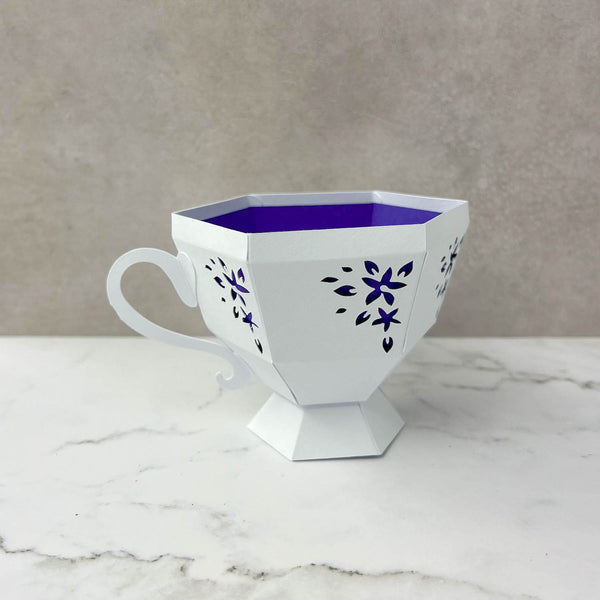
I used print-then-cut with the Kromekote Glossy White paper to make some paper butterflies.

I added plastic wrap to the inside of the teacup and added some plantable flowers from the garden center. I also taped some wire to the back of the butterfly printout and stuck that in the flowers. You can add artificial flowers, a flower arrangement, some treats, or candy. You can even add a cupcake! The options are endless! I'm going to make a whole set of these 3D teacups to decorate the tables for our Mother’s Day dinner I will be hosting here at my house again this year.
We can't wait to see your teacups! Show us on Facebook or Instagram! Tag your creations with #cardstockwarehouse to be featured in our stories!
Happy CraftingRandall
INSTAGRAM: @craftateria