


Yep, it’s me, Tmika, with the fallest of fall projects, LOL, because I love it and why not? We all love a good wreath, don’t we? We all love a great way to use tons of awesome colors, don’t we? We all love a quick project, right? Well, I’m here with all three of those things! Get your favorite fall colors, or any colors for that matter… Cause this is a versatile project. 😉 We should do one for Christmas, huh?… Hmmm…🤔🤔 Sorry, I got sidetracked with my second favorite season… OK let’s get back on track. This project won’t require a lot of supplies but I’ll have a short list down below. So let’s jump right into it, shall we??
Supplies:
- Cardstock Warehouse Cardstock Papers
- Oatmeal Speckletone (80lb)
- Bitter Chocolate Colorplan (100lb)
- Desert Sand Mirri Sparkle (104lb)
- Cherry Wood Veneer (12PT)
- Jellybean Green Pop-Tone (65lb)
- Lemon Drop Pop-Tone (65lb)
- Wild Cherry Pop-Tone (65lb)
- Mandarin Orange Colorplan (65lb)
- Hot glue
- Foam tape
- Circle/Scallop dies, Cutting Machine or Circular Object to trace
- Ribbon
- Bow (optional)
- Battery Operated Lights (optional)
- Faux Flower Buds/Branches (optional)

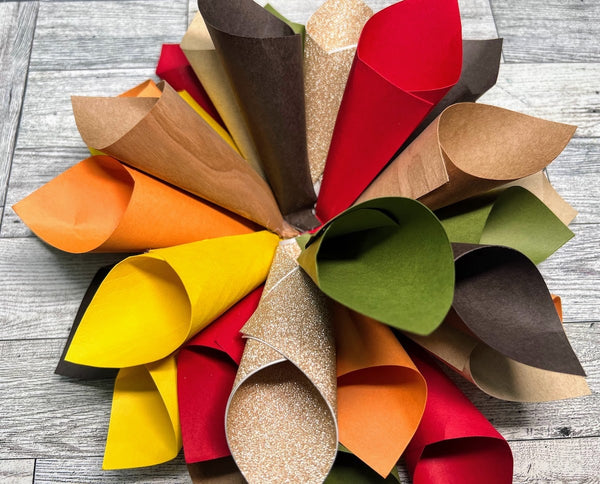
Cut all your chosen colors into 4in x 4in squares. One 8 1/2 x 11 sheet will get you four squares with a little overage. Save some of those scraps... we will need a few of them at the end.

Start to roll each square into a cone shape. The best way for me was to match up opposite corners and roll tighter from there. Pardon my use of tweezers in this photo… I smashed the heck out of my thumb last weekend…and y’all just don’t wanna see that… you’re welcome. 😜 Once you have it rolled to your liking, add hot glue to the seam and close. Pinch the bottom edge. This will prepare the cone for laying on the base.

I turned on some music and went to town! I cut 32 squares in 8 different colors. But I only have 30 cones. The Mirri Sparkle paper is not double-sided so I layered them on top of each other back-to-back so the white will not show.

Use your die cutting machine, your dies, or heck… a small saucer, and trace 🤷🏽♀️ to create your circle backing. My largest circle die is 4 inches in diameter. They vary from there downward. The left two I used as my base. I cut each of those circle dies out twice to create a nice sturdiness. The right 3 I used to create my front cover. I cut the largest one twice and cut the other layers out once.

For the front cover circles, the ones with the scallops, I added some pop dots in between one of the layers to add dimension. Here are the two things you should have.

I laid all my cones in separate piles to help me with my assembly line. Then I started adding glue to the bottom and placing them evenly on my circle base. My bottom row has 13 cones. And that is because of the chunky brown one, lol!

I went back in with my second and third layers. Place your cones in between the gaps of a previous layer until all your cones are gone.
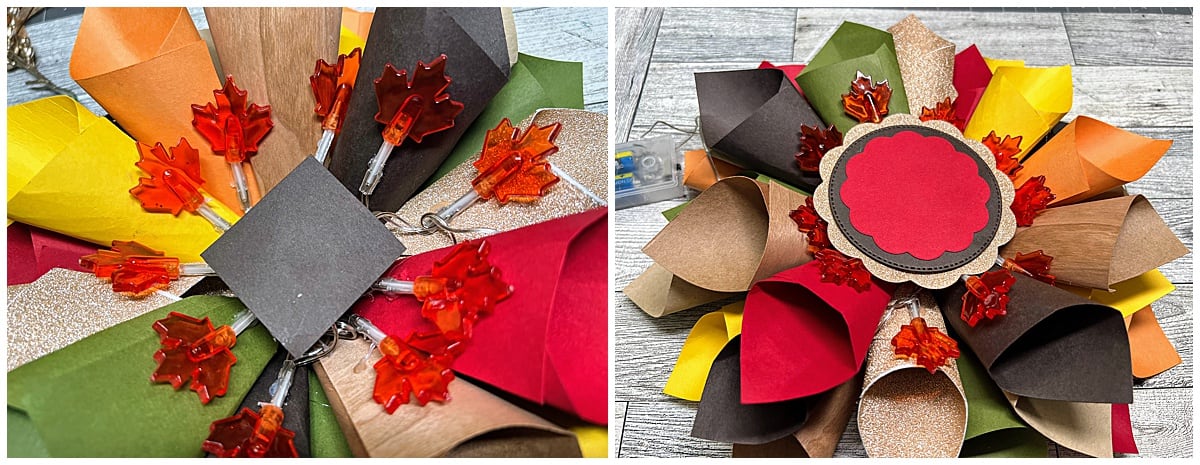
This next part is optional. I wanted to add some lights and a bow to the front of my wreath. I cut the gold edging off of some of the ribbon and made a cute bow for the front. (We'll glue this on later) I also added some of these gold tree branches I've had for a couple years.

The lights I got from the Dollar Tree. I just placed them around the perimeter of my top layer and added a little bit of hot glue to secure it.

Now for this next part, grab those paper scraps you had left over. You’re going to take three of them and roll them tight. Secure the cylinder with hot glue.

Add a glob of hot glue to the back of your front cover piece. Add the cylinder shape on top and wait until cooled. Once it has cooled and is set, add hot glue to the center of the cylinder to offset the weight.
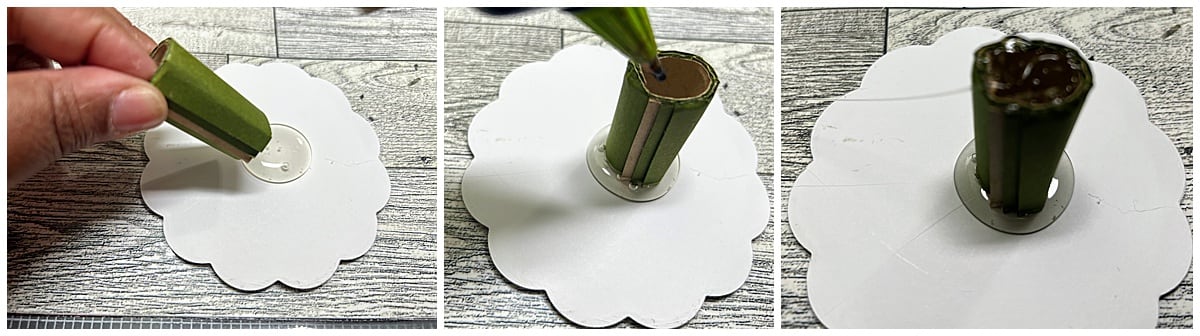
Now, I did mine the hard way. But here’s a little tip: first secure the cylinder to the center of the wreath with hot glue. Wait until it is set and centered. Second, cut two rectangles out of the scrap pieces and glue them together. Add that to the top of the cylinder and secure it with hot glue. Finally, add your front cover/topper piece to that rectangle. It’s much easier than trying to peek under to see if it’s center. 🙄🙄
Use a piece of ribbon to hang your wreath. I usually twist the top of my ribbon so that it can accommodate my door hanger. I took off a little portion of the wire part of the ribbon and used it as a twist tie.

Secure the bottom of the ribbon with hot glue and use another piece of scrap paper to fold over and cover the edges.

I added hot glue and double sided tape to the back of my battery pack and placed that on the lower part of my circle. I adhered the ribbon to the top half with hot glue.

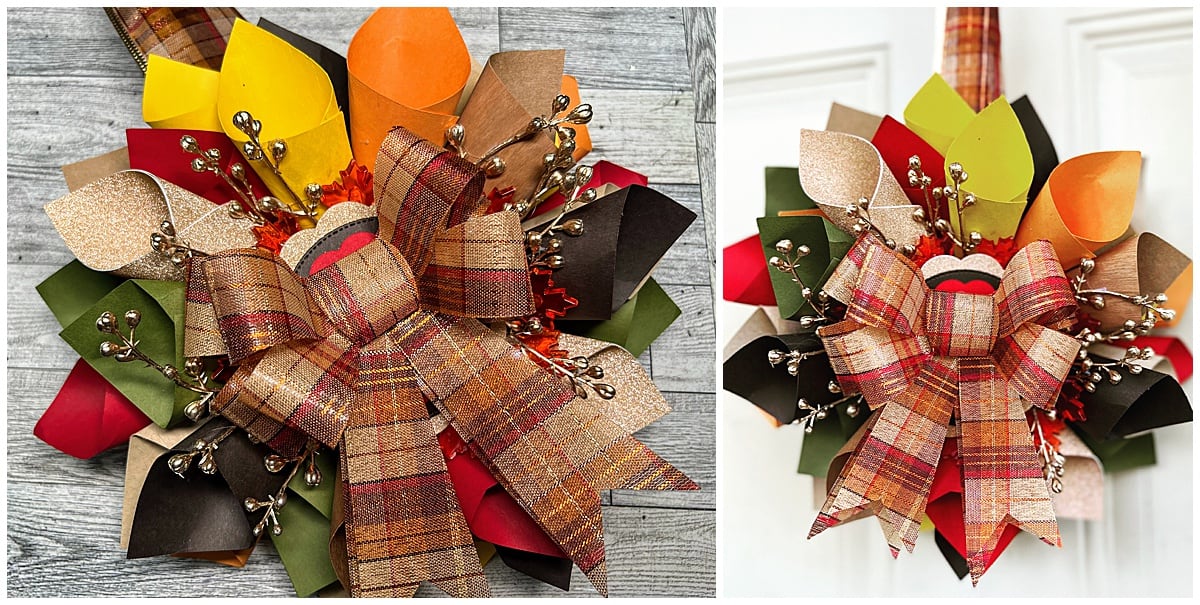
Once you have that done, you can glue in your little gold branches and then glue your bow onto the front. And you're done!

Here are some finished pictures. I hope you like what I created! I hope Fall is your favorite time too and this inspires you as well! Don’t forget to be grateful and thankful for all the things that you have. After all, fall isn’t just about the colors, right? MMWAH!!
Please be sure to leave a comment to let us know what you think. If you are super fancy - tag us in your creations on Facebook or Instagram. You can use the hashtag #cardstockwarehouse to be featured on our page!
Tootles!
Tmika
YouTube
Instagram
Pinterest
Facebook