


Art was not something that interested me in high school or college - I only started crafting in 2018! I try to do something creative everyday - coloring, assembling cards, building albums and folios. I am probably biased, but we have the BEST design team - I am frequently inspired by our team's use of our colored cardstock. I usually spot one of our team member’s creations and then immediately need to use their unique color palette, the die they used, or incorporate their great idea. Today, I am working on a card for a creative friend, inspired by paintbrushes and a (mainly) green and blue color palette. This is my first time working with our Chartreuse cardstock and I am in love! Let's get started!
Supplies:
- Cardstock Warehouse Cardstock Papers
- 8.5” x 11” Chartreuse Colorplan 100lb
- 8.5” x 11” Forest Colorplan 100lb
- 8.5” x 11” Sweet Tooth White Pop-Tone l00b
- 8.5” x 11” Turchese Sirio Color 80lb
- 8.5” x 11” Blacktop Foundations 100lb
- 8.5” x 11” Cherry Wood Veneer 12pt
- 8.5” x 11” Gun Metal Mirricard 100lb
- Paintbrush Dies or Similar SVG file
- Watercolor Wash Stencil
- "Color My World" Sentiment stamp or similar
- Die Cutting Machine
- Inks
- Blending Tools
- Distress Oxide in Crushed Olive, Rustic Wilderness, and Salty Ocean
- Warm Brown Dye Ink
- Black Pigment Ink (for sentiment)
- Stamping Block or Platform
- Scissors
- Bone Folder
- Scoring Board
- Paper Trimmer
- Liquid Adhesive
- Double-sided foam squares
- Low tack masking tape
- Embellishments
- Clear embossing powder
- heat tool
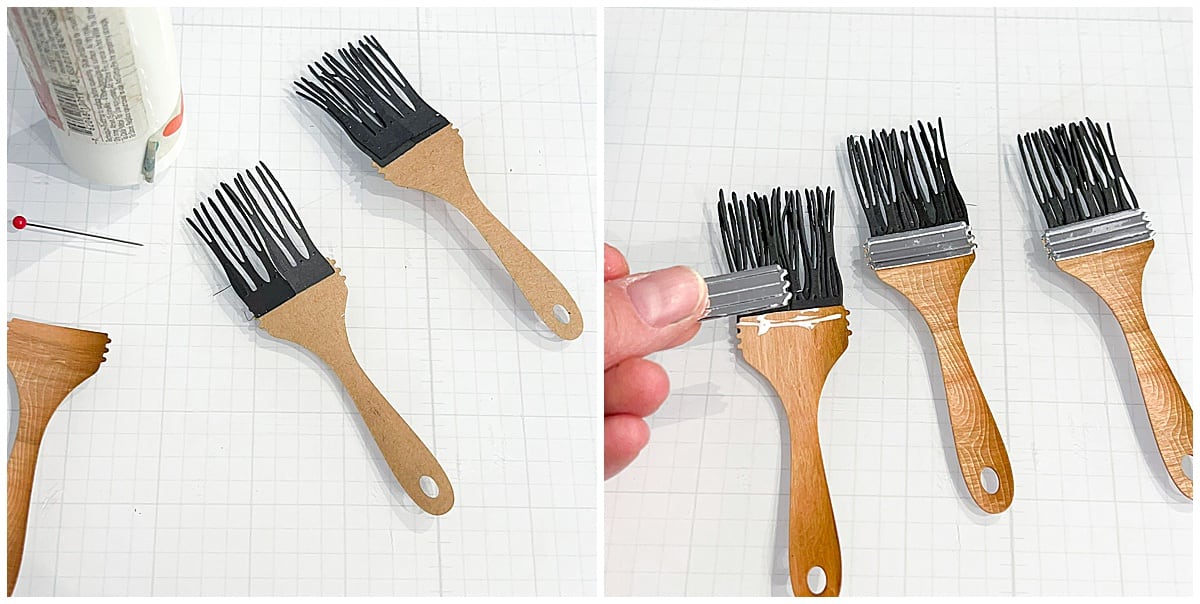
To get started, I cut 6 paint brush handles from Cherry Wood Veneer. I used liquid adhesive to glue two of the handles together, to create three handles with greater weight and depth. Next, I cut 3 ferrules from Gun Metal Mirror Cardstock. Next, I cut a bunch of bristles from Blacktop, and 3 paint splatters - one each from Forest, Chartreuse, and Turchese. I used brown dye ink on each of the 3 handles, on the right side only.

Next, I began assembling the paint brushes. Using liquid adhesive, I attached the ferrules and bristles to the handle. I used between four and six bristle die-cuts on each paintbrush.
Using Black Top cardstock measuring 10” x 7”, I scored at 5” landscape to create an A7 card base. I also cut a 4.75” x 6.75” panel of Sweet Tooth White. I stamped my sentiment on a scrap piece of Sweet Tooth White in black pigment ink and embossed it with clear embossing powder.

I grabbed a watercolor wash stencil from my stash and adhered it to the top 2.5 inches of the white card panel. I then blended crushed olive, rustic wilderness and salty ocean on the panel towards the top left, center, and top right, respectively.

I adhered the card panel on the cardbase using liquid adhesive. Using the ink left on my brushes, I blended the greens and blue over the word color on the sentiment. I layed out my card. I attached the paint die-cut to the brush using liquid adhesive. To give the brushes dimension, I used double-sided foam squares to attach the paint brushes.

I added a few paint splatter cuts in Chartreuse and Turchese. Then I embellished the card with various crystals. Here is the finished card!

Tips and Tricks:
- Don’t have a stencil? Go make your own on your cricut! Find a file that best resembles the paint splatter you wish to use and use masking paper to make a stencil.
- Consider embossing the Sweet Tooth panel with an embossing folder for more texture.
Show us your artsy projects! We'd love to see your creations! Show us your creations on Facebook or Instagram, and tag them with #cardstockwarehouse.
Happy Crafting! Traci Selig
IG: @tracicrafty
Blog: Traci Crafty