


Well, FALL IS HERE!!! It’s such a refreshing time for me!! It’s a calming time for me, a time for reflecting and focusing on the upcoming holiday season. During this reflection time I noticed that I have a lot of unused crafty things. Dies, embossing folders, stencils, etc. ALL things that would look great with Cardstock Warehouse paper! So with this post I am going to incorporate dies that I loved when I bought them and have been set aside, all while still incorporating a fall gnome theme. Because who doesn’t love a gnome, coffee, fall, and Christmas? Unfortunately there are no SVGs for you here, but hopefully you’ll get some inspiration and motivation to use your stash and Cardstock Warehouse paper to create Make Something Beautiful®.
This one will be quick and easy BUT it will have a long lasting impression. Do you want to know why? Because YOU will want to raid your stash, pull out your unused items, and create until your heart's content.
Supplies:
- Cardstock Warehouse Cardstock Papers
- Bright White Colorplan 100lb
- Copper Stardream Metallic
- Chartreuse Colorplan 100lb
- Wild Cherry Pop-Tone 100lb
- Lemon Drop Pop-Tone 100lb
- Bitter Chocolate Colorplan 100lb
- Oatmeal Speckletone 80lb
- Madero Beach 100lb
- Other Supplies Needed:
- Adhesive
- Bearly Arts Glue wet adhesive
- Foam Tape Squares dry adhesive
- Hot Glue
- Ribbon, Trim
- Flat Back pearls
- Dies and Stamp sets from your stash
The first thing you’ll want to do is grab your die and stamp sets. Admire them, then put them to work. I cut out all of my necessary pieces and extras in case I change my mind. I usually can't decide what colors to make, so I'll take a little more time and cut out optional colors. The colors I used are listed in the photo below.

I usually cut my bases out with white cardstock first, then cut the pattern paper to put on top for extra stability. That is also the first thing I do for assembly- add wet glue to the backs of the layers and put them together. This is also the point where I stamp out my sentiment.

I layered everything together with glue and now I need to decide what accessories I want to go with my gnome card.

I put everything on top of a tag die with hot glue and pop dots. I think it turned out super cute!

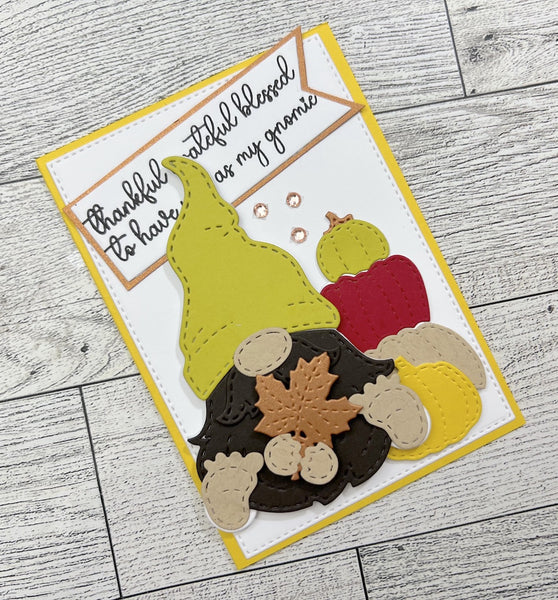
I wanted to continue my gnome play, so I wanted to make a card as well. I cut out the same gnome set and used the same color combo. I cut a card base a little bit bigger than my large stitched rectangle die using Lemon Drop. I love dies with faux stitching! I also changed the hat and smallest pumpkin to Chartreuse since I was using a yellow card base.

Following the same steps as I did with the tag, I put the card together. A little foam tape behind the gnome really helps him stand out!
So, have I encouraged you to bring out your dies and stamps and create something beautiful? Sometimes shopping your stash is just as fun as actually shopping at a craft store. You can find so many things that you forgot about and get excited all over again! Here are some more pictures of how my card and tag turned out.

Please be sure to leave a comment to let us know what you think. If you are super fancy - tag us in your creations on Facebook or Instagram. You can use the hashtag #cardstockwarehouse to be featured on our page!
Tootles!
Tmika
YouTube
Instagram
Pinterest
Facebook