


Hey y’all! Stephanie Vittorio here from Coffee Stamps Chaos with a fun, simple project that doesn’t require much time or effort! Just some cardstock, dies and some basic crafting tools will have this project completed quickly.
You will need:
- Cardstock Warehouse Cardstock Papers
- Colorplan Smoke
- Sirio Ultra Black
- Diamond Print White Glitter
- Water-based markers
- Spray Bottle with water
- Large acrylic stamping block
- Die cutting machine
- Metal Dies
- Stitched Rectangles
- Wolf Die
- Adhesive
- Nuvo Deluxe Adhesive
- ⅛” Scor Tape
- Advanced Tape Glider
- Acetate (or plastic sheet) for ink smooshing

To start, I cut my cardstock panels to the following sizes:
- Diamond Print = 4 ¼” x 5 ½”
- Sirio Ultra Black = 4 ¼” x 5 ½”
- Colorplan Smoke = 4 ¼” x 11 (card base)
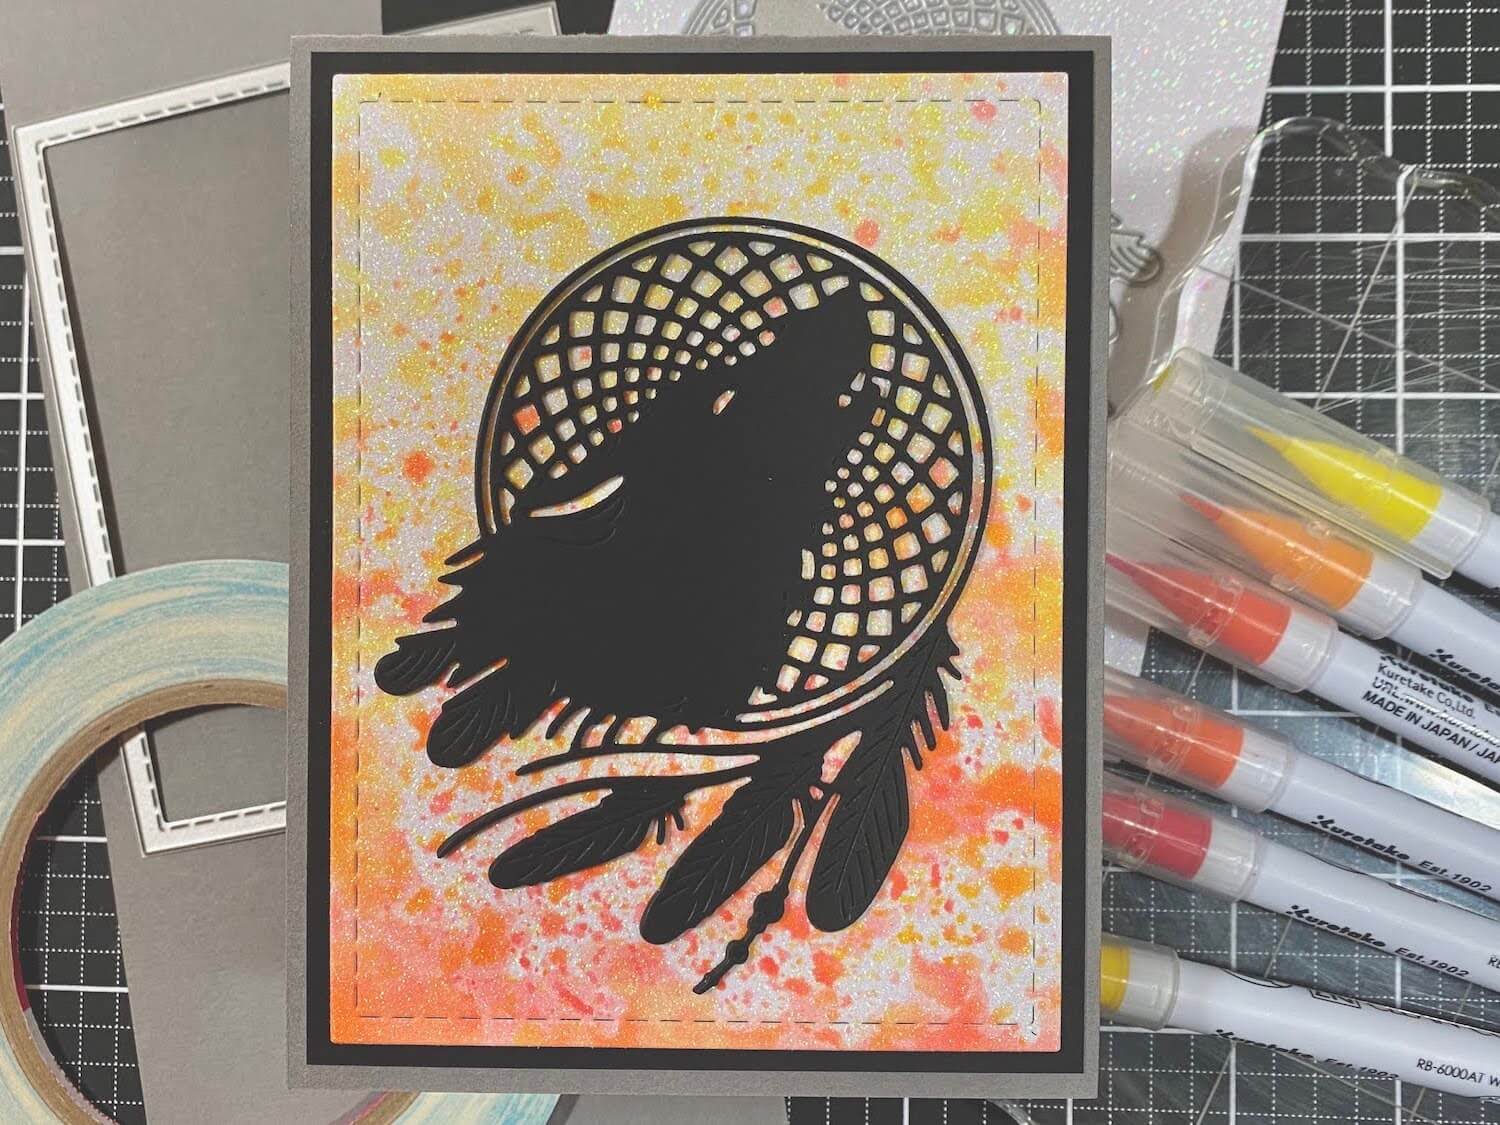
Then I die cut the Glitter Panel using my Frame die. Next, you will want to die cut your main image. I cut mine 3x and then glued them together using Nuvo Liquid Adhesive to create a thick die cut image. I used my Acrylic block to press them firmly together between layering to ensure secure adhesion.

To create the ink smooshing effect, use a marker to put color onto an acrylic block. I always start with my lightest colors and work towards my darkest colors. I do not wipe off my block in between colors since I work from light to dark. Spray the ink with water and use an acetate sheet to pick up color - it should look like colored water drops. Then smoosh the acetate onto your Diamond Print cardstock - the colors will stay where you put them down since this paper is made to absorb colors. Continue to repeat the process until you have reached your desired look.

Once you are done ink smooshing, allow your panel to fully dry.

Once the glitter panel is dry, layer your glitter panel onto the Sirio Ultra Black layer and adhere them using your choice of adhesive. Then, trim the Ultra Black layer so there is a bit of it showing around the sides of your glitter panel.

Then adhere your Die Cut image to the glitter panel using Liquid Glue - I use Nuvo Deluxe Adhesive because it adheres to glitter paper beautifully and permanently. I also pressed down over the die cut using an acrylic block to make sure it fully adheres. Nuvo glue dries quickly so it’s perfect for things like this.

Thanks for hanging out with me! I hope you enjoyed this tutorial and I hope you will share your creations using Cardstock Warehouse papers with us so we can oooohhh and aweeee over your projects!
You may even be featured on the Cardstock Warehouse social media platforms. You can use the hashtags #cardstockwarehouse & #makesomethingbeautiful for a chance to be featured on our Instagram and Facebook pages!
I look forward to sharing a new project with you next month, but until then, don’t forget to check back for lots of other super cute projects from the rest of the Design Team - they are all SUPER talented! AND pick up some of these papers! They’re great quality, made in the USA and there is a wide variety of weights, colors and textures - in short, they are all the perfect choice for all of your paper crafting needs!
If you’d like to, you can follow me on social media to see what I’ll make next at the links below my name. I would love to see what you create and to support and encourage other crafters!
Sincerely,
Stephanie Vittorio
Facebook: Coffee Stamps Chaos
Instagram: Coffee Stamps Chaos