


Hi Crafters! Kayla here and I’m back on the Cardstock-Warehouse Blog!
I can’t believe we’re already into summer! I can’t say, where I live, that we truly have summer weather but so far this year we have and it’s been amazing! We’ve been soaking it all up and have started going on adventures and camping!
So I thought how perfect would it be to make camping journals for my Little’s to document and draw while on our adventures!
To begin, grab your supplies:
- Cardstock Warehouse Cardstock Papers
- Paper Bag Kraft 100lb
- Gold Mirror
- Slate Colorplan 100lb
- Sweet Tooth Pop-Tone 100lb
- Forest Green Colorplan 100lb
- Gumdrop Green Pop-Tone 100lb
- Sour Apple Green Pop-Tone 100lb
- Cobalt Colorplan 100lb
- Rust Colorplan 100lb
- ZIG 2- Way Glue Pen- Chisel Tip
- Cutting machine
- Twine
- 3D Adhesive Foam Squares 1/4”
- Paper cutter
Once you’ve gathered your supplies, begin by opening up a new project on design space (however any program works). These are the images I added. You can also find the Cricut Design Space project HERE.
You’ll want to make sure you highlight all the images and size them to the correct size you want for your journal. My journals are small, they are only about 5” x 7”.
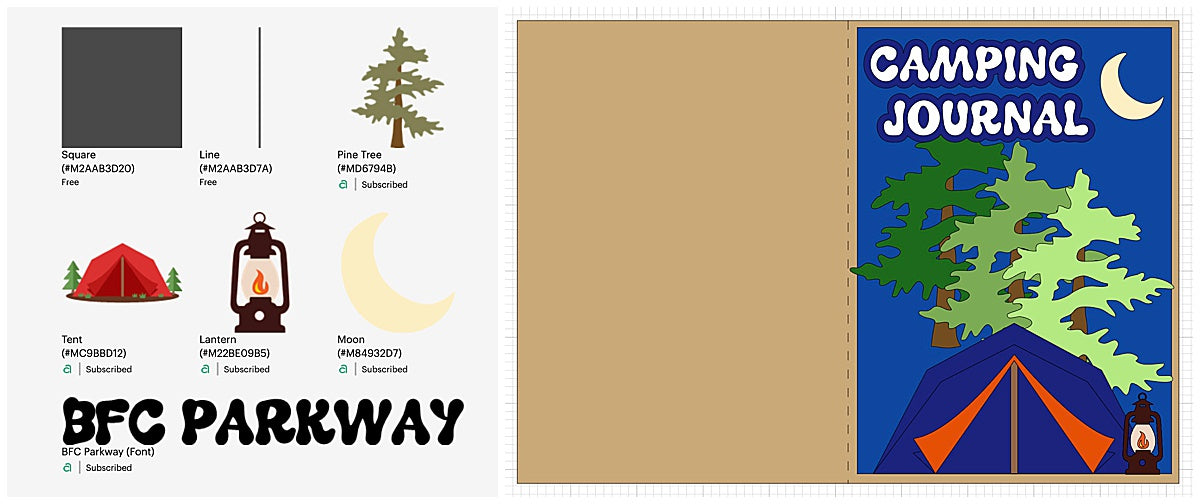
Next, begin cutting your pieces. I used Kraft for the outside of the journal, white for the pages inside the journal and the letters for the “camping journal” sentiment, Cobalt for the “sky”, Forest, Gumdrop, and Sour Apple for the trees, Gold Mirror for the moon, Slate and Rust for the tent, and the lantern is a combination of Gold Mirror, Rust, Sweet Tooth, and Kraft.

Now let’s assemble our journals! First, start by folding your journal paper in half and do the same for the outside of the journal. I’m using this bone folder to get crisp edges. Then you can assemble that together.

Next, let’s assemble the tiny pieces and add them to the outside of the journal. I used mounting tape on some pieces to add dimension.
Finally, add the twine to the binding of your journal and there we have it!

My kids loving having these on our recent camping trip, and they will be a souvenir we always treasure. You can also change up the die-cuts on the front to fit a different theme.


Thanks for coming along with me today as we made these fun journals! Hope you enjoyed it!
Making your own? We'd love to see your creations! Show us your creations on Facebook or Instagram.
Happy Crafting and Happy Trails!
Kayla