


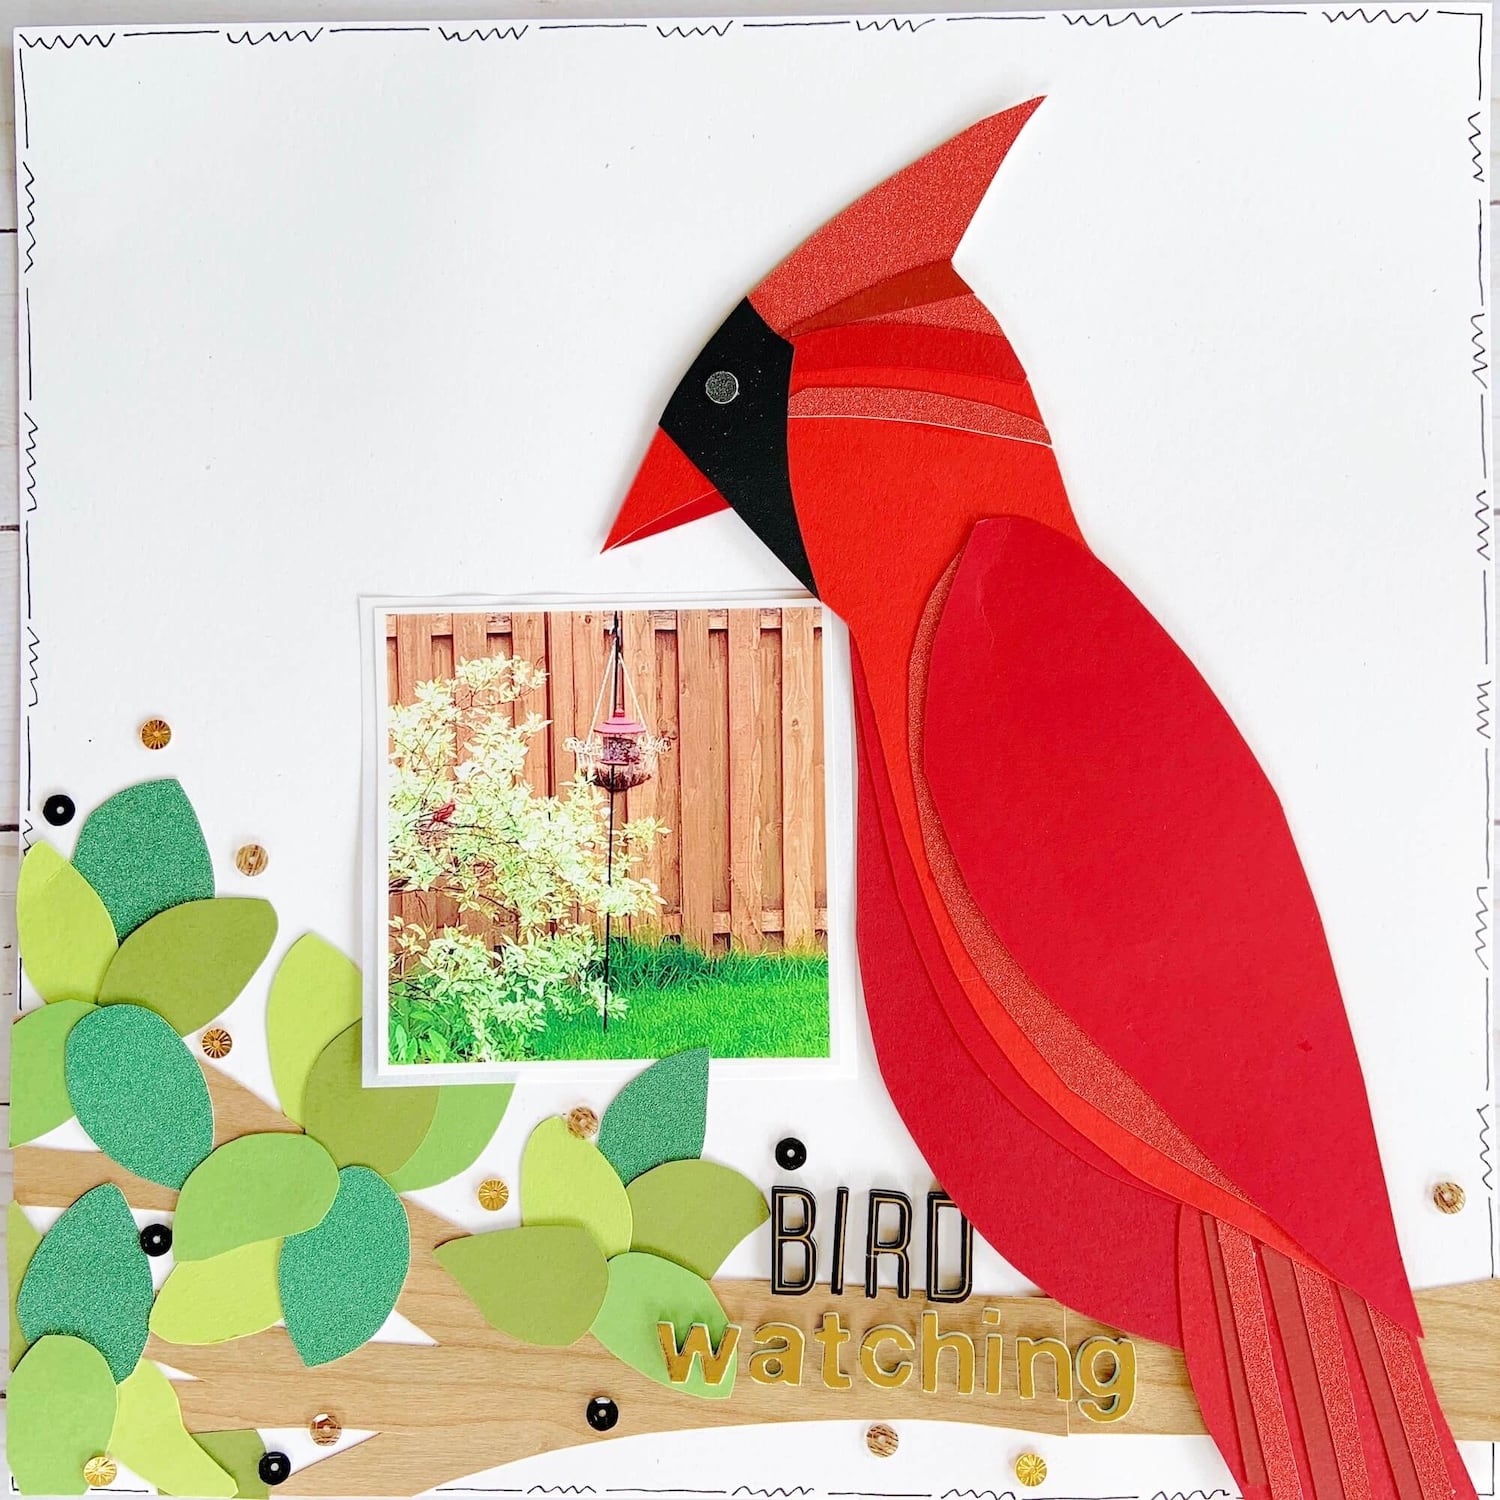
Hi everyone! Today I have a layout for you sharing one of my favorite techniques, paper piecing. I love using different shades of color to “paint” or create a replication of something. I usually go for large animals on my backgrounds but really this works for anything. I happen to love watching birds from my craft room and was inspired by the cardinals in my yard to create this.
Supplies Needed:
- Pencil with eraser
- Adhesive
- scissors
Papers Used:
- Cardstock Warehouse Cardstock Papers
- Wild Cherry Pop-Tone
- Electric Red Foundations
- Bright Red Colorplan
- Mars Stardream
- Jupiter Stardream
- Red Wagon Mirrisparkle
- Evergreen Mirrisparkle
- Jellybean Pop-Tone
- Sour Apple Pop-Tone
- Gumdrop Pop-Tone
- Starch White Speckletone
- Cherry Wood Veneer
- Bianco Pergamenata Parchment Paper
Optional:
- Sequins
- Alpha stickers
- Pen
I started by sketching out my cardinal. I just freehand drew it but you could easily print out a clip art image or use a cut file as your base. Use a scrap piece of cardstock to create your template. When you are happy with the shape, cut the template out. This will make a quick and easy tracing guide for you.

The next step is to choose your color palette. For this project, I chose various colors of red including Mirrisparkle and Stardream papers for added texture and depth. You can do whatever makes you happy! You can use a combination of cardstock and patterned papers, print your own pattern papers, or stamp on some cardstock for something extra. It’s completely up to you on what paper options you use. I really fell for all of the reds from the different collections. They are rich and deep colors that worked perfectly on their own so I chose not to embellish the papers further.

Once you have your paper combinations (I used 6 red papers), you need to figure out where you would like each paper to appear. Things to think about during this step are shadows, darker or lighter areas of your inspiration piece, and any visible markings or patterns on your inspiration. I like to lay out the paper in the order that I think I’m going to use them in to see if I like the way they go together.

Then use your template and start tracing. This technique is perfect to use up paper scraps that you may have laying around. Just make sure you have enough to cover the area that you want. For example, the scrap piece of Red Wagon Mirrisparkle I had was pretty small so I had to turn the template to figure out the best way to get the head piece I wanted. I layered up the papers with the brightest red on the body and head thinking that the sun would be shining on the bird. I used the darker papers as I went to the stomach because that area would be shadowy. I used the Jupiter and Mars Stardream to cover seams on the head and to add some shine to create dimension. Don’t forget to add the small details such as the black eye and face.

Finish your project off by adding some more details. I chose to use the Cherry Wood Veneer paper to create a branch for my cardinal to rest. Of course, I needed to add leaves to the branch so I used all of my scraps of green cardstock and freehand cut some leaf shapes out. Then just add the final embellishing, title, and photo and you have a beautiful paper pieced creation! I used some Bianco Pergamenata as a mat for my photo to add another layer of dimension and interest.
What are you creating right now? Follow Cardstock Warehouse on Instagram or Facebook for more fun paper projects, and tag #cardstockwarehouse on social media when you use our paper for a chance to be featured on our page!
Thanks for visiting! Have a crafty day!
Daisie
Instagram: @daisiescraps
YouTube: Daisie Scraps