


Hi, Crafty Friends! I wanted to share with you a cute Easter cake topper that’s sure to bring some joy.
Materials:
- Cardstock Warehouse Cardstock Papers:
- Lessebo Colours: Kelly Green, Lime Green, Flamingo, Bubblegum
- Colorplan: Park Green, Sorbet Yellow, Azure Blue, Rust
- Stardream Metallic: Crystal
- Woodstock: Arancio
- SVG File - Easter Cake Topper
- Bearly Art® Glue
- Hot Glue
- Foam Strips/Cubes
- Acetate
- Foam Balls or Glitter/Confetti
- Cake Stick or Straw
To begin this project, you’ll need to upload the SVG into Cricut (or your preferred cutting machine), and then upload all of the clip art which is in a separate folder. Make sure to work with the dimensions listed if you want to replicate the cake topper, or you can branch off and do your own thing with the base file :)
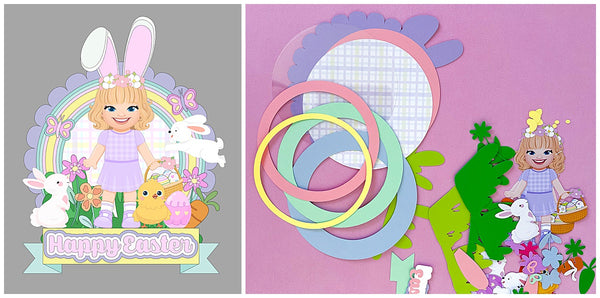
When working with shakers, I like to start with my actual shaker so that if I’m using glitter, I give enough time for the glue to dry before I can “shake” it. In this case I’m only using foam balls, but I still decided it would be a great start. I grab my circles that I will be using and beginning from the thinnest circle (yellow) to the thickest (purple), I begin gluing them on top of each other using my Bearly Art® glue. Once they’re glued together, I flip it over, add glue around the edge, and place my acetate on the glue and set aside.

Then, I grab my printed circle, and using foam strips, I form a layer where my foam balls will sit inside of. If you’re working with fine glitter and/or confetti, you’ll want to use a glue gun to seal where each piece of foam strip meets (one ends, one starts) - otherwise, if you’re using foam balls, you can skip that step. *In the file, there’s one additional full circle, in pink, that I glue behind the printed circle just to make it a little sturdier (see the “all pieces” photo for layering placement.) After your circle is outlined with foam strips, you can place your foam ball/confetti or glitter mix inside. Then, I use hot glue along the top of the foam strips so I can put my assembled shaker circles on top and seal. You can also use silicone glue or Bearly Art® Glue if you’d like to have some “wiggle room”.

Now we’re going to set our shaker aside, and work with our other pieces. I’m going to begin gluing the ear pieces together, and then glue them on top of my purple scalloped base so I can make sure the height is where I want it to be.

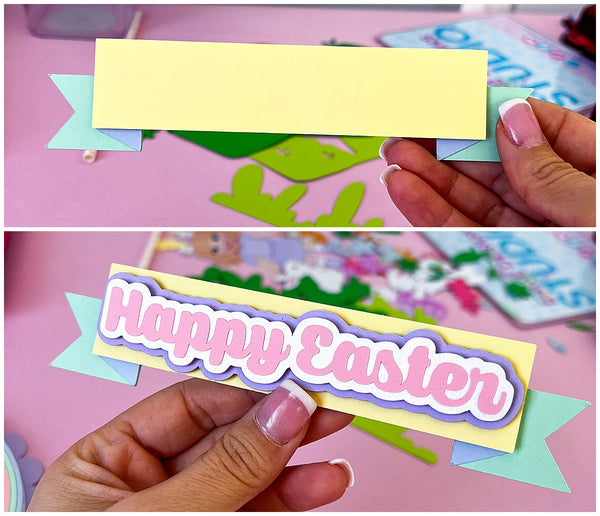
Next, we’re going to start the assembly of our banner. I like to add foam behind the top layer where the name will be, but it’s totally optional and up to you. I just like when things have more dimension.
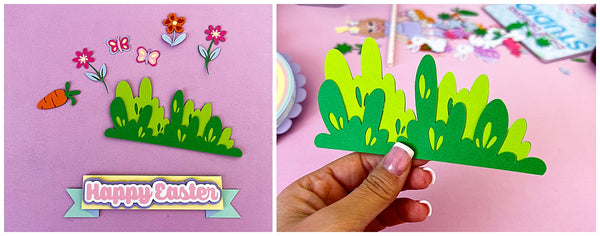
We’re almost done! Now, we’ll begin gluing all of our small detailed pieces together, and then assembling them directly on our cake topper. Their placement can vary based on your liking, along with the use of foam tape. I like to give different depths to mine so some items will have no foam, some will have one, and some items may be doubled in height. Once everything is placed where you’d like, attach your cake stick or straw to the back.
I hope this project inspired you to Make Something Beautifu!® I love how it turned out!

Follow me at @lacedesignsstudio for more party and paper decor ideas, and share your creations with Cardstock Warehouse on Facebook and Instagram! Tag your projects with #cardstockwarehouse to be featured on our page!
Happy Crafting!
Amanda (@lacedesignsstudio_)