


🎶Oh, Christmas Tree, Oh Christmas Tree.. how lovely are thy branches🎶..now you’ll have that song stuck in your head for the remainder of this blog post, lol! Right after Fall and the beautiful change of the autumn leaves comes the most beautiful scenes I have ever witnessed in person. Newly fallen snow on the ground, a blanket covering the trees and cars… Looks just like a postcard. Until it turns into a gray muddy mushy mess… But we'll forget about that part for now... 😬
What a great way to remember the prettiness of it all by making a tag that the recipient will enjoy and possibly hang as an ornament on the tree? Or keep it in the box for a souvenir… Many options to treasure this handmade gift tag. Let’s get to it, shall we?
Supplies:
- Cardstock Warehouse Cardstock Papers
- Forest Green
- Sirio Ultra Black
- Pop-Tone Sweeth Tooth
- Candy Pink
- Gold Mirror
- Black Mirror
- SVG Files (Free)
- click the link, then right-click to save to your computer
- Zip Dry glue
- Dimensional pop dots
- String/twine/ribbon
- Coordinating Eyelets
- Binder clip
- Snow Marker
- Heat tool

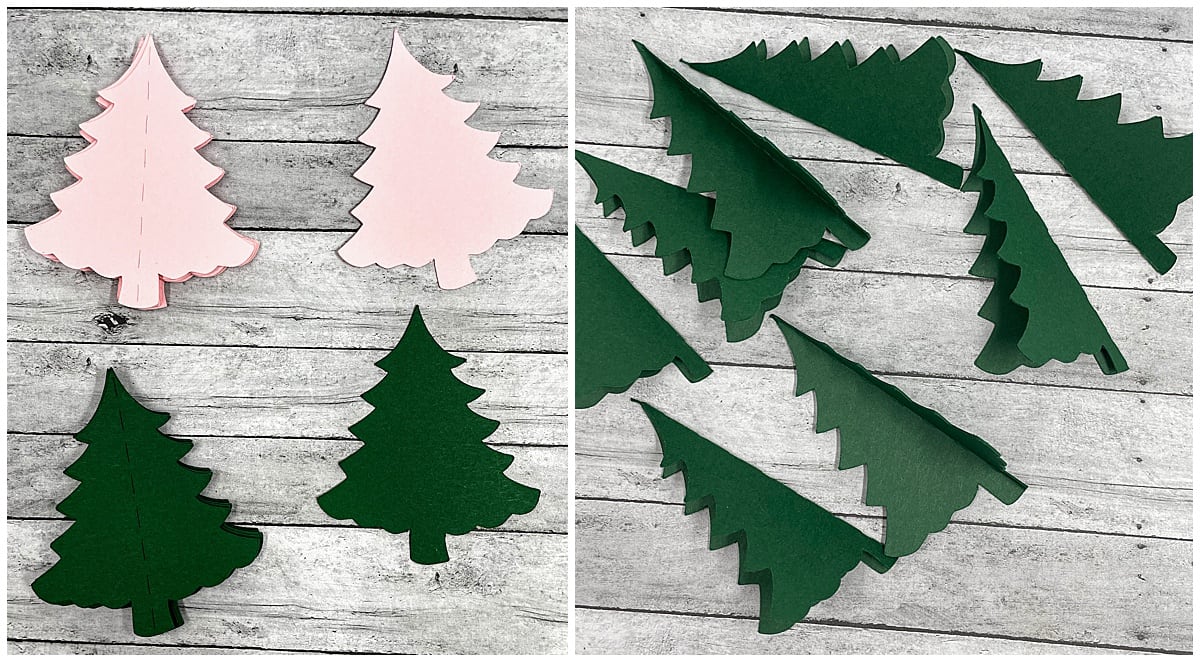
Let’s start by cutting out our Christmas tree SVG files. For each tree you are making, you’ll need one of the bases (the one with no perforation marks) and you’ll need eight of the perforated ones. (FYI… I am making two tags, one pink, one green.) (pic1) Fold all of your 8 pieces in half at the perforated marks. (Pic 3)
Stack them neatly in one pile and attach a binder clip to keep them steady. (Pic 4) Using your snow marker, apply the liquid to the edges of the tree branches. (Pic 5) Use your heat tool to apply heat and make the snow marker bubble. I love this effect! If you've never used a snow marker, you should definitely pick one up! (Pic 6)

Let them cool for a quick second and take them apart again. So that you can put them back together. Yeah, that sounded funny typing it, just as funny as it sounds reading it I’m sure, lol! (Pic 7)

Next, apply wet glue to the back of one side of the folded tree, apply this to the base. (Pic 8) I alternate sides… from left to right. (Pic 9) This is how it should look in the end. Nice and fluffy!! 🤗 (Pic 10)

Now take your tag bases (mine are white) and the large “L” shaped die cuts. (Pic 11) We will lay these on the top of the tag toward the left. Use wet glue to adhere. (Pic 12) Cut off the excess on the top and bottom. (Pic 13)

Grab the thinner layer and apply foam tape to the back. I split pop dots in half lengthwise to accomplish this. (Pic 14, 15) Apply that to the top of the base layer. (Pic 16)

I also created a larger offset layer to add a little extra. One I cut in gold mirror and one in black mirror. Be sure to line the circles at the top. (Pic 17,18) Add coordinating eyelets to the holes at the top. (Pic -9)

Now we can bring back the trees and add them to the tag. (Pic 20) Add dimension to the back of the tree and attached to the top right. (Pic 21,22)

You can add some ribbon, trim, or twine to the tag. I added twine to mine. I also added a tiny bow and a Merry Christmas sticker to the bottom as a sentiment. (Pic 23) So cute!! (Pic 24) Love how the snow market imitates fresh fallen snow!! ☺️ (Pic 25)

So what do you think??? I love it. Ahh, how cute does it look on packages?? Make them smaller or larger - your choice!! (Pic 26)

I hope (as always) that you enjoyed this project and will enjoy the SVG files. It was really fun to create!! Merry Christmas to you all …and to all a good night!! (I couldn’t resist)
Please be sure to leave a comment to let us know what you think. If you’re super fancy – tag us in your creations on Facebook or Instagram. You can use the hashtag #cardstockwarehouse to be featured on our page!
Toodles!
Tmika
YouTube
Instagram
Pinterest
Facebook
PS- Looking for more Christmas inspiration? You can find all of our Christmas Blogs HERE!
1 comment
These are beautiful! Thank you for the free cut file!